


Managing DNS records and integrating a new domain with Shared Hosting at Faastic is a straightforward process. Whether you are transferring an existing domain or setting up a new one, follow these structured steps to ensure a smooth integration with your Shared Hosting Advanced or Pro package.
Part 1: Configuring Domain Nameservers
To begin, modify your domain's nameservers to point to our Shared Hosting services:
- Access your Faastic Client-area: Log in to view your domain settings.
- Modify Nameservers: Navigate to "Nameservers" and select "Use custom nameservers". Enter the following:
- ns1.faastic.com in the Nameserver 1 field
- ns2.faastic.com in the Nameserver 2 field
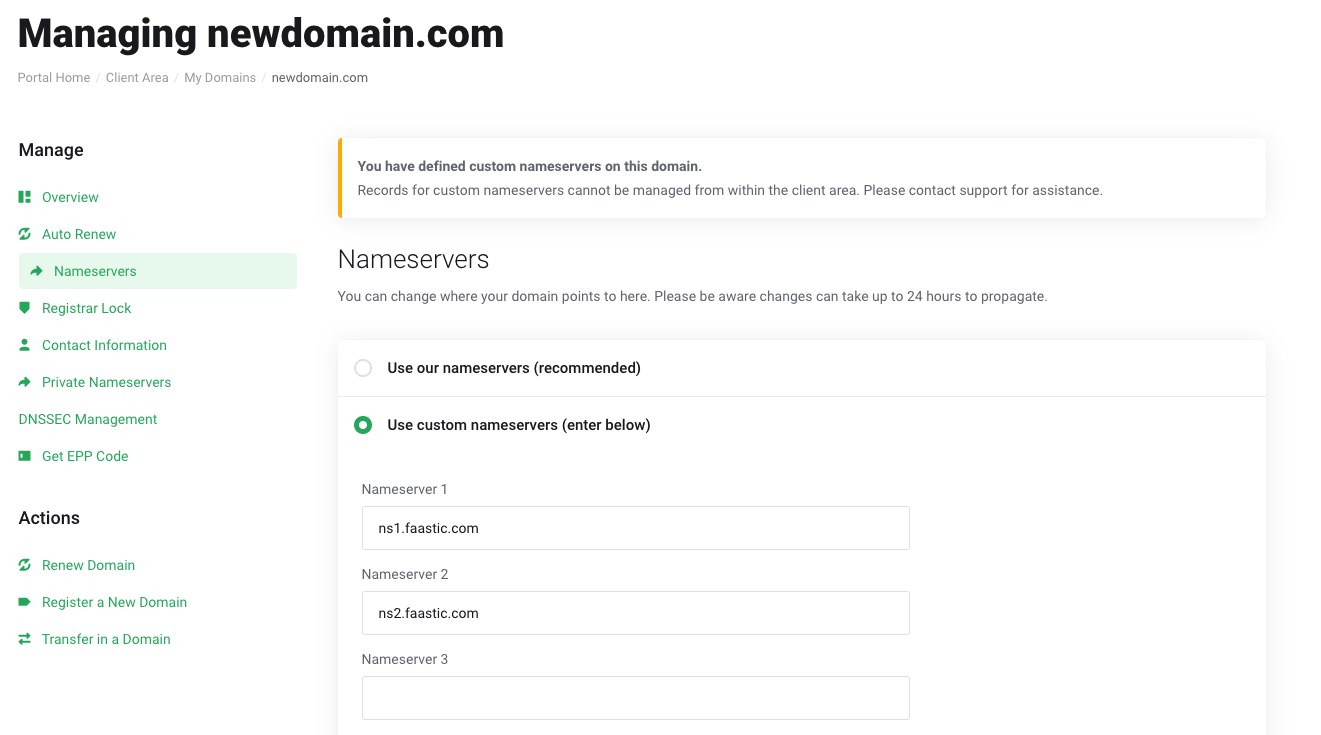
- Apply Changes: Click on "Change Nameservers" to update your settings.
Upon completing these steps, your domain will redirect to the Shared Hosting nameservers.
Part 2: Linking Domain to Shared Hosting
Next, add your domain to your Shared Hosting to start hosting applications and email services:
- Access Shared Hosting Admin Panel: Navigate to your hosting dashboard.
- Add Web Domain: Click on "Add web domain" and provide the necessary details for your domain.
- Ensure both 'DNS Support' and 'Mail Support' are checked.
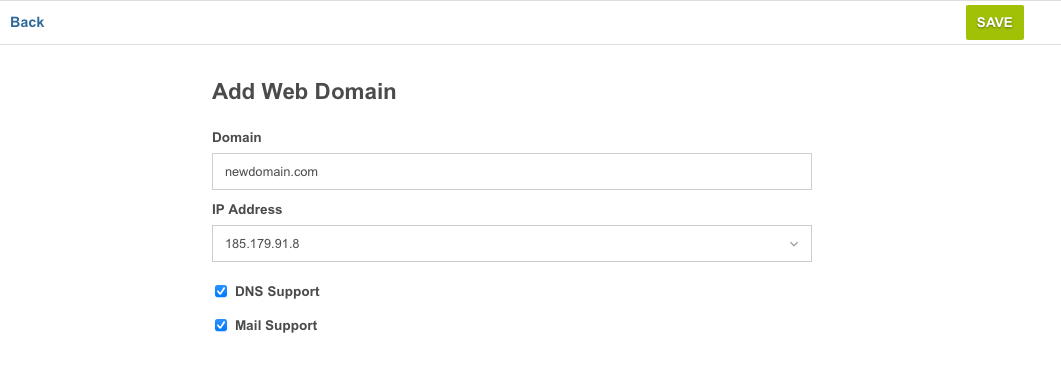
- Save Configuration: After filling in your domain information, click on "Save" to finalize the setup.
Congratulations! Your domain is now linked to your Shared Hosting. You are all set to host your applications and manage your email.
